After completing this lesson, you’ll be able to:
In this lesson, you will:
After completing this lesson, you’ll be able to:
In this lesson, you will:
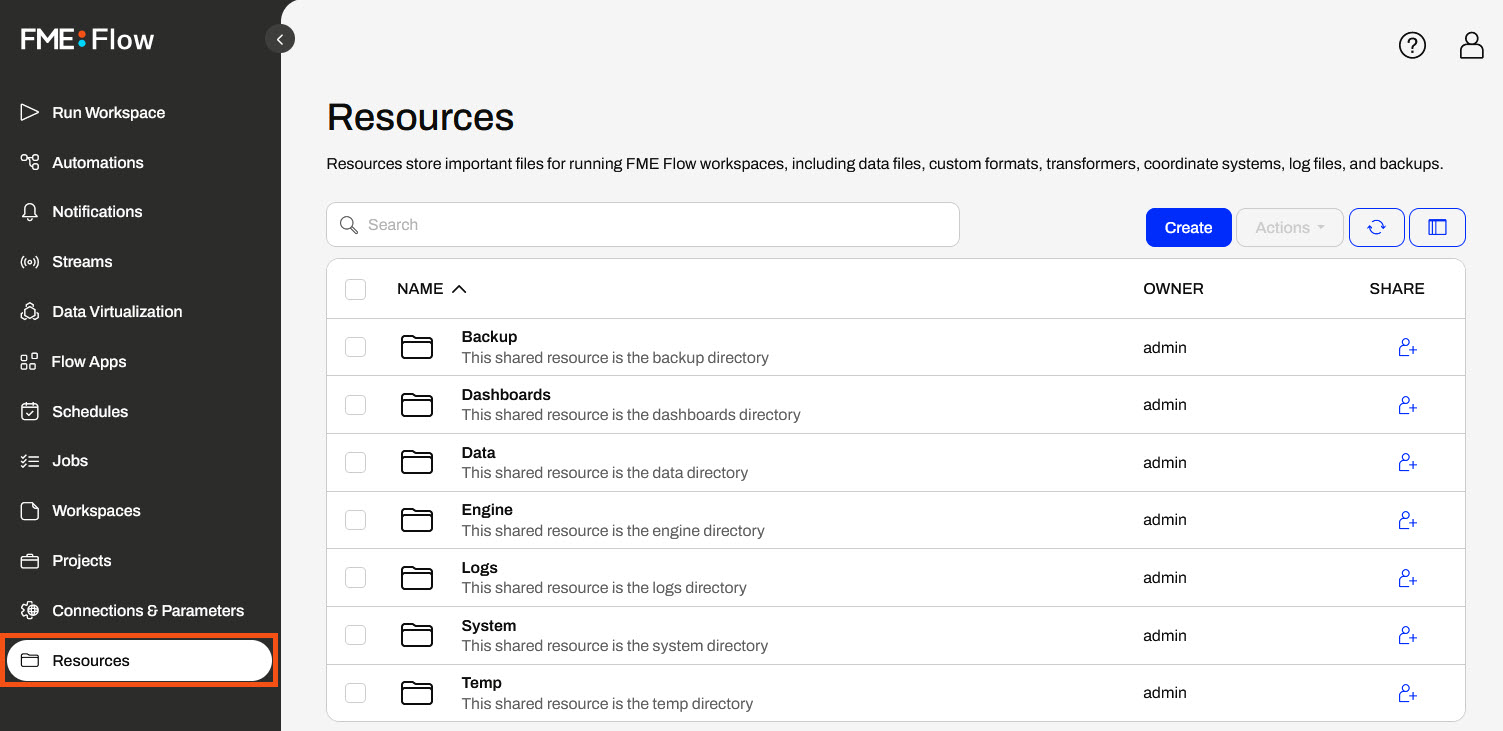
Another method of managing source file data in FME Flow is to use Resources, a built-in file management system that allows you to publish and reuse data in all FME Flow workflows. You easily access Resources from the FME Flow side menu.
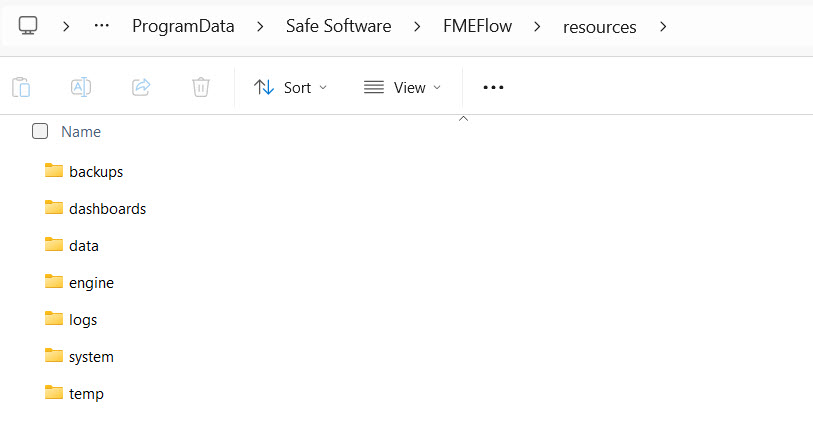
The Resources page contains files you have uploaded to FME Flow, as well as those created by FME Flow during normal operations, such as logs and backup files. The FME Flow System Share stores Resources content, which you can find in C:\ ProgramData\Safe Software\FMEFlow\resources by default on Windows. If you're taking a Safe Software-hosted training course, your FME Flow stores Resources in the default location. You'll see the same folders and files here as the Resources on FME Flow.
Remember that Resources and Repositories are different. You publish workspaces to repositories. You cannot run them if you upload them to Resources.
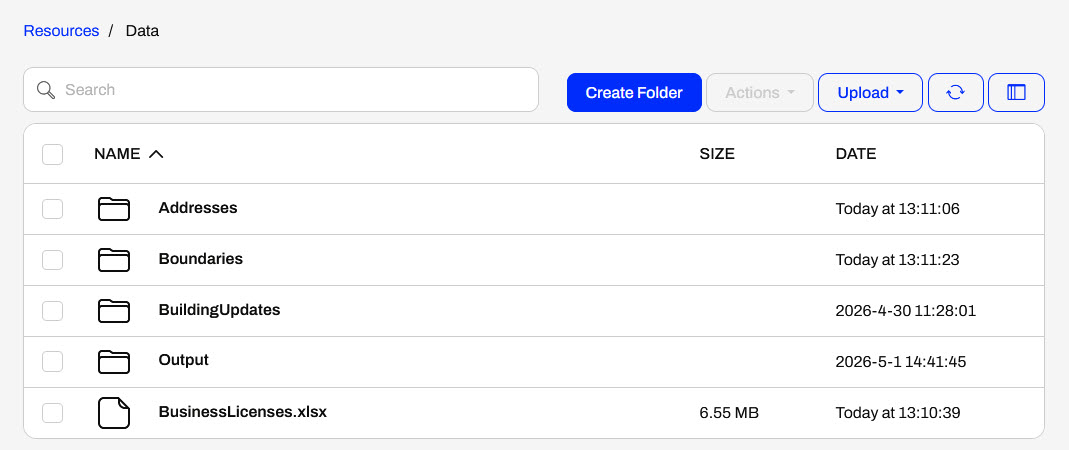
One of the default Resource folders is the Data folder. This folder stores source and destination data for your workflows. You can create folders and sub-folders within them and upload file-based datasets. If your FME Flow user or role has sufficient permissions, you can use the datasets stored in Resources as source data or write output data for any workspaces.
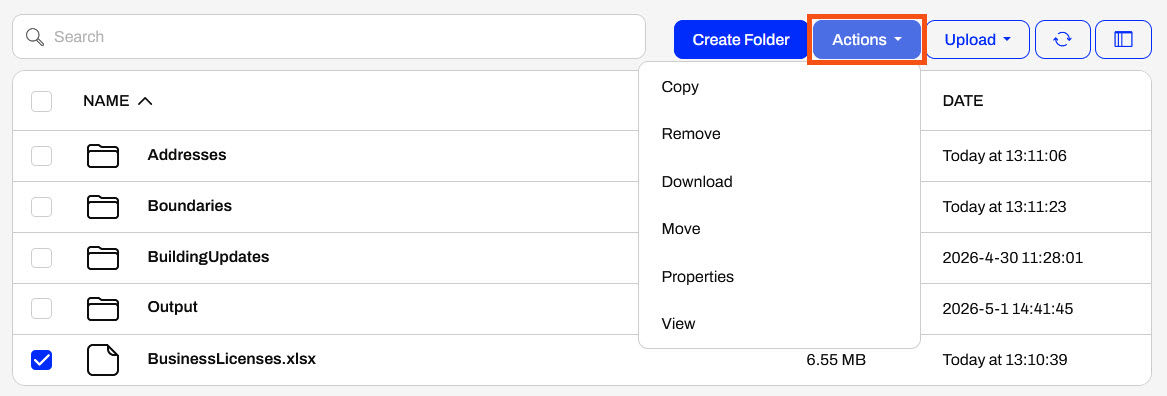
Once you select an item, the Actions options list various operations you can perform on the file or folder, such as duplicate, edit, upload, copy, delete, or move files (or folders).
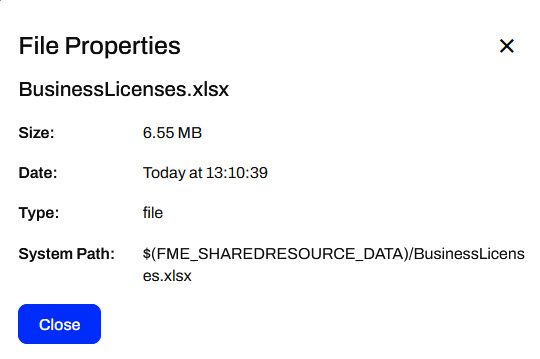
Remember the $(FME_SHAREDRESOURCE_DATA) parameter from Build Self-Serve Workflows with Parameters? The Data folder in Resources is precisely where it points to. You can find the Resources path to reference data in Properties.
You publish data to Resources in the Data folder, like adding data to a workspace repository. In the publishing wizard, you must switch the default location for uploading files from the Repository to Resources.
Like publishing data to a repository, you can check the Publish Summary in the Translation Log to see the Uploaded Resources.
When you run the workspace on FME Flow, the source data parameters reference the Resources location where you published the data. If the source data is a user parameter, you may upload or select different data to input. However, if there's no parameter, the workspace uses the Resources data by default, and the end-user cannot change it.
For more information on source data parameters on FME Flow, review Build Self-Serve Workflows with Parameters.
There are several benefits to using the Resources file system for data storage on FME Flow:

Sven continues working with his previous workspace, which clips voting locations to neighborhoods in Vancouver and stores the transformed data in a geodatabase. He is working with the source GML and KML data and is experimenting with finding the best location to store the data when he runs the workspace on FME Flow.
This time, follow along with the steps below to help Sven publish the source data to FME Flow Resources. The benefit of this is that other workspaces can easily access the data, and you do not need to store multiple copies in repositories.
Open the starting workspace in FME Workbench (C:\FMEData\Workspaces\DeployWorkflowsWithFMEFlow\publish-data-to-fme-flow-resources.fmw).

This is the same starting workspace as the previous lesson, Publish Data to Workspace Repository. If you already have the workspace open in FME Workbench, you can continue working with it.
Click Publish to open the publishing wizard.

Select the Training repository to house the workspace and name it publish-data-to-fme-flow-resources.fmw.
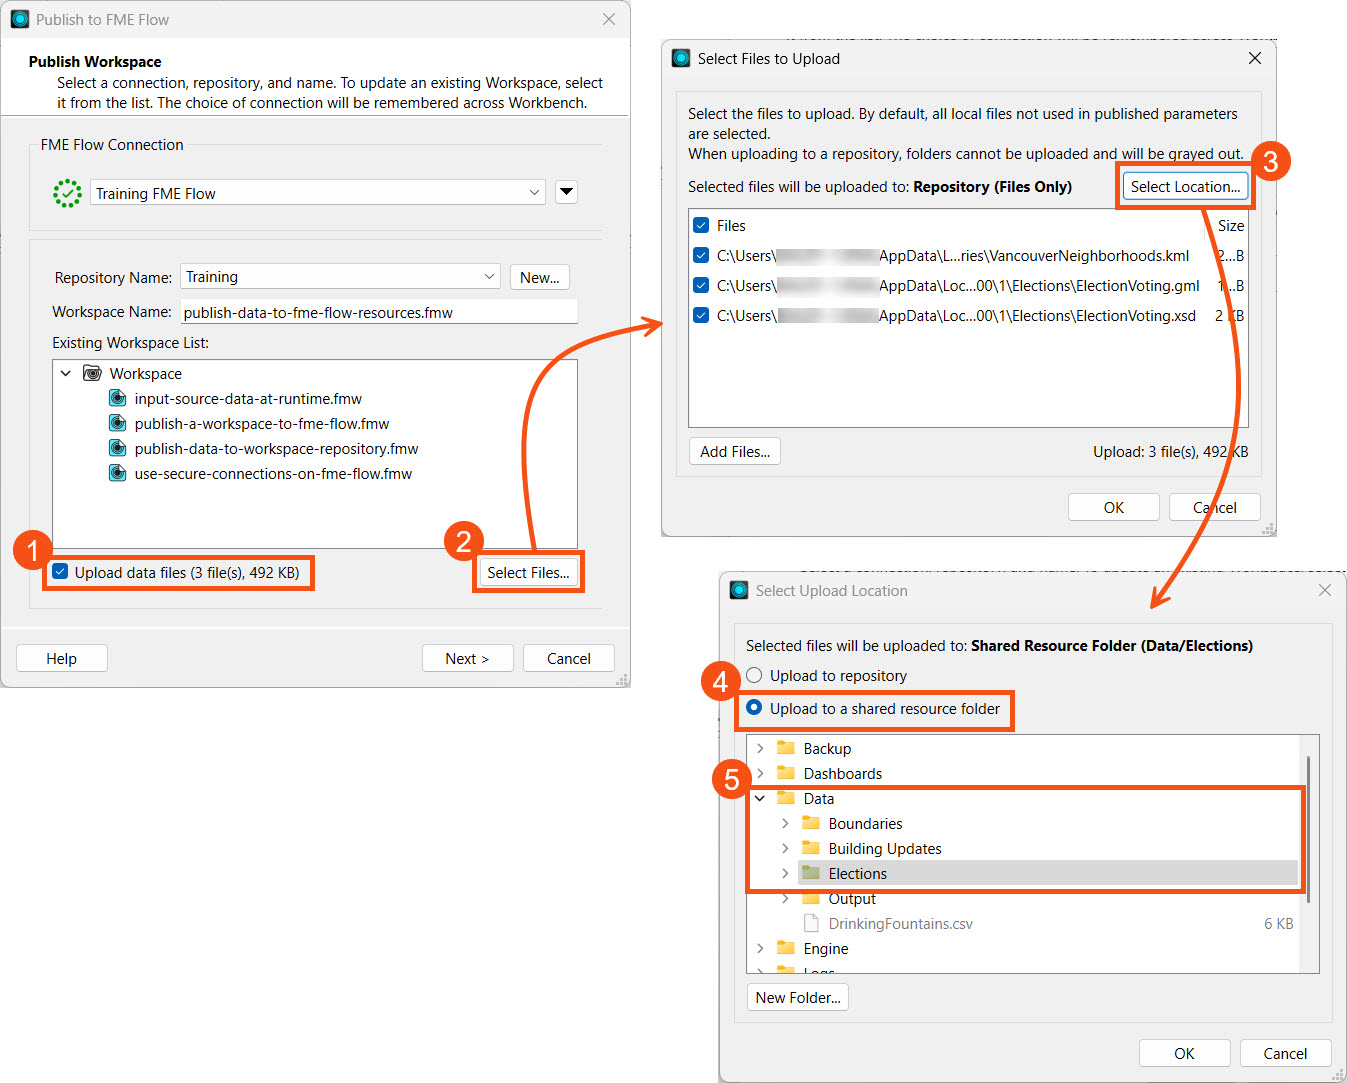
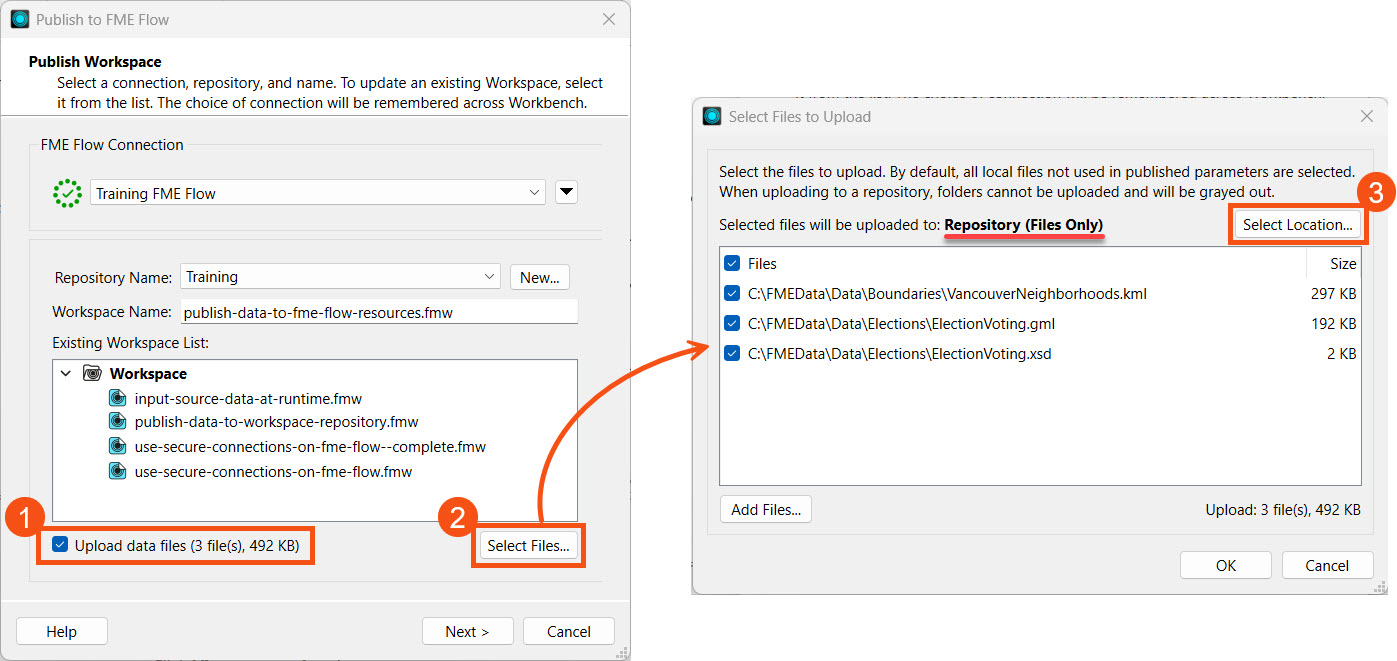
Like uploading source data to a repository, select Upload data files and then open Select Files... Source files are uploaded to the repository by default, so open Select Location... to choose Resources instead.
Select the Upload to a shared resource folder option, then select the Data folder. Click New Folder to create an Elections folder to store the data.

Click OK to close and save your settings. From the Select Files to Upload window, you should now see that the upload location has changed to Data/Elections in the FME Flow Resources. Click OK to go to the last publishing step.

Register the workspace with the Job Submitter service and click Publish.
In the translation log's Publish Summary, you should see that FME included the three files as Uploaded Resources again.
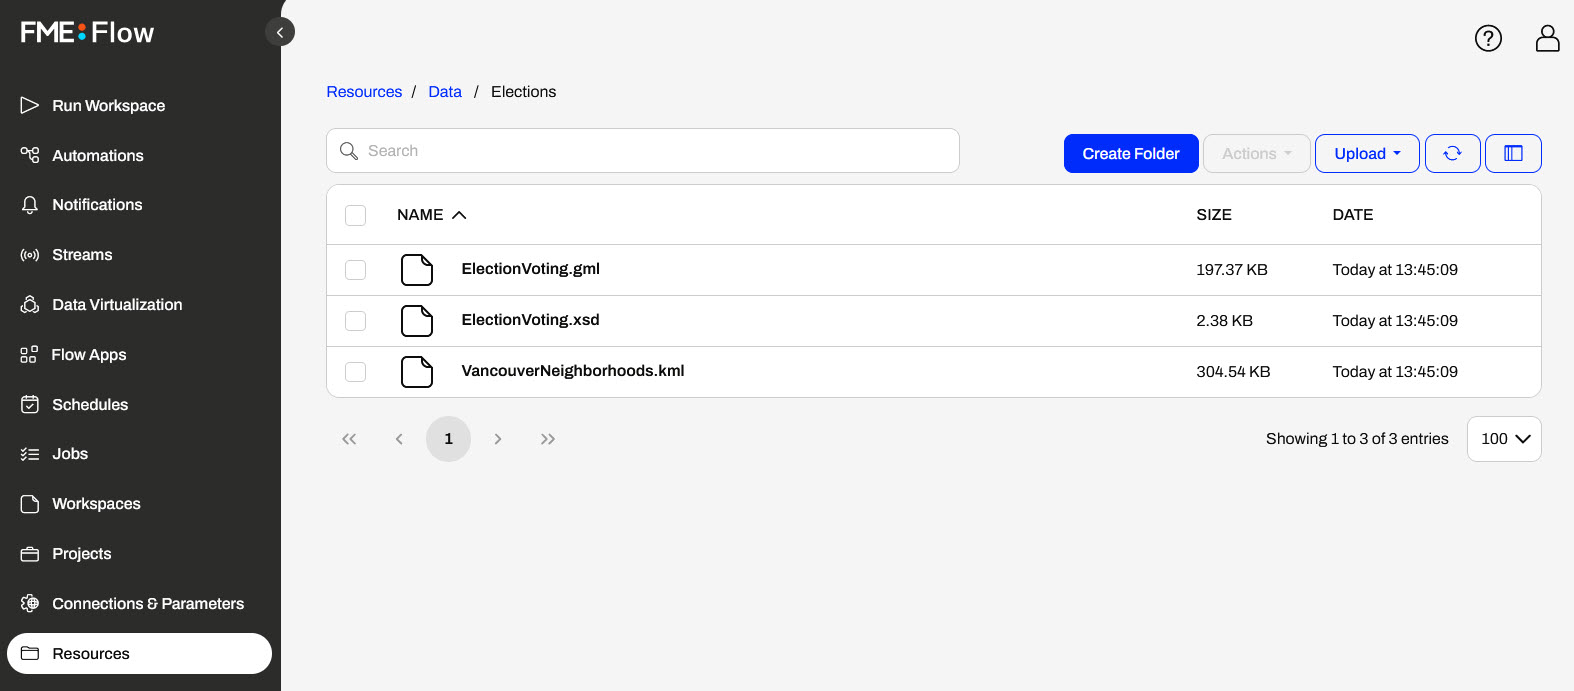
Navigate to FME Flow and open the new Elections folder in Resources > Data. You will see the three uploaded files there.
Next, open the Run Workspace page and select your recently published workspace.
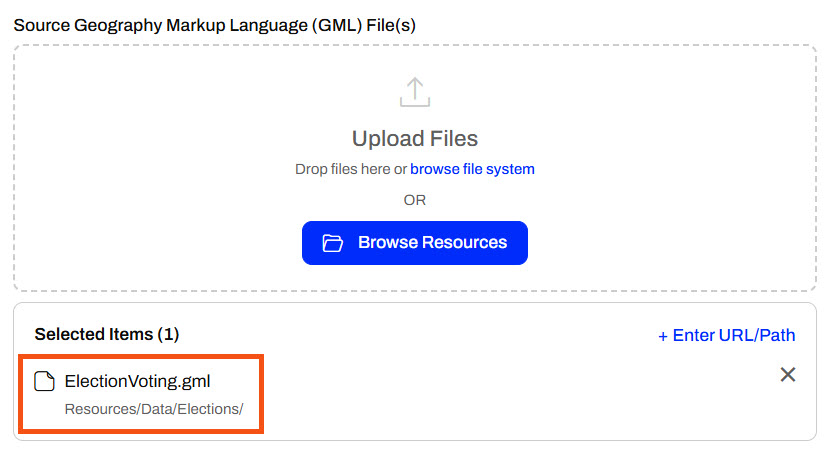
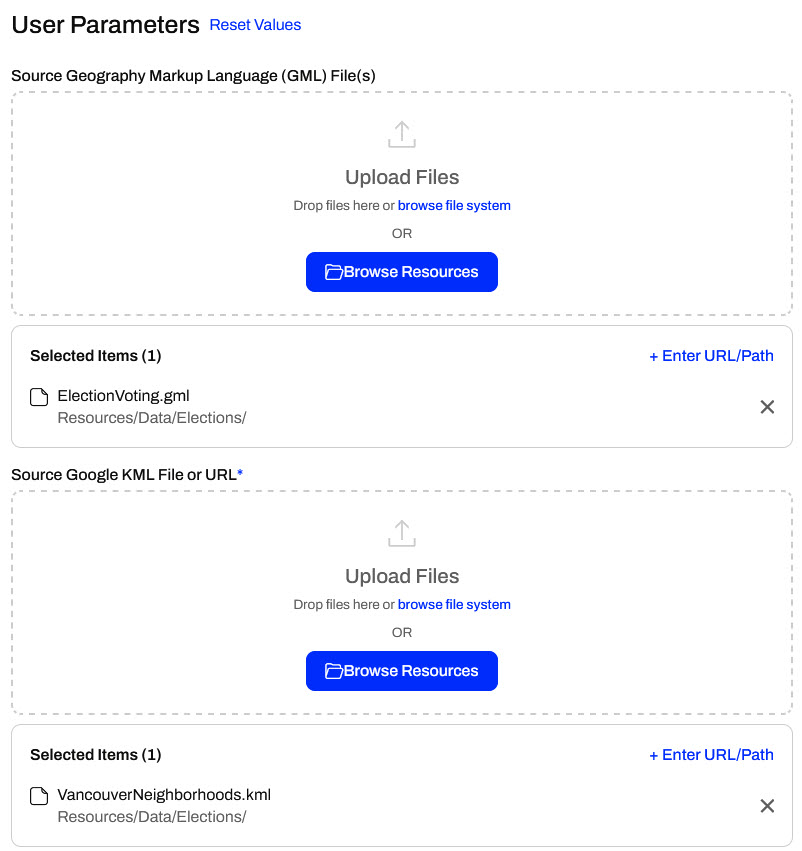
Under User Parameters, you will see the default source files reference the data you published to Resources.
Run the workspace. The workspace reads the data from Resources. Other workspaces can also use these datasets, limiting the duplicate data you otherwise store in repositories.
Another method of managing source file data in FME Flow is to use Resources, a built-in file management system that allows you to publish and reuse data in all FME Flow workflows. You easily access Resources from the FME Flow side menu.
The Resources page contains files you have uploaded to FME Flow, as well as those created by FME Flow during normal operations, such as logs and backup files. The FME Flow System Share stores Resources content, which you can find in C:\ ProgramData\Safe Software\FMEFlow\resources by default on Windows. If you're taking a Safe Software-hosted training course, your FME Flow stores Resources in the default location. You'll see the same folders and files here as the Resources on FME Flow.
Remember that Resources and Repositories are different. You publish workspaces to repositories. You cannot run them if you upload them to Resources.
One of the default Resource folders is the Data folder. This folder stores source and destination data for your workflows. You can create folders and sub-folders within them and upload file-based datasets. If your FME Flow user or role has sufficient permissions, you can use the datasets stored in Resources as source data or write output data for any workspaces.
Once you select an item, the Actions options list various operations you can perform on the file or folder, such as duplicate, edit, upload, copy, delete, or move files (or folders).
Remember the $(FME_SHAREDRESOURCE_DATA) parameter from Build Self-Serve Workflows with Parameters? The Data folder in Resources is precisely where it points to. You can find the Resources path to reference data in Properties.
You publish data to Resources in the Data folder, like adding data to a workspace repository. In the publishing wizard, you must switch the default location for uploading files from the Repository to Resources.
Like publishing data to a repository, you can check the Publish Summary in the Translation Log to see the Uploaded Resources.
When you run the workspace on FME Flow, the source data parameters reference the Resources location where you published the data. If the source data is a user parameter, you may upload or select different data to input. However, if there's no parameter, the workspace uses the Resources data by default, and the end-user cannot change it.
For more information on source data parameters on FME Flow, review Build Self-Serve Workflows with Parameters.
There are several benefits to using the Resources file system for data storage on FME Flow:
Sven continues working with his previous workspace, which clips voting locations to neighborhoods in Vancouver and stores the transformed data in a geodatabase. He is working with the source GML and KML data and is experimenting with finding the best location to store the data when he runs the workspace on FME Flow.
This time, follow along with the steps below to help Sven publish the source data to FME Flow Resources. The benefit of this is that other workspaces can easily access the data, and you do not need to store multiple copies in repositories.
Open the starting workspace in FME Workbench (C:\FMEData\Workspaces\DeployWorkflowsWithFMEFlow\publish-data-to-fme-flow-resources.fmw).
This is the same starting workspace as the previous lesson, Publish Data to Workspace Repository. If you already have the workspace open in FME Workbench, you can continue working with it.
Click Publish to open the publishing wizard.
Select the Training repository to house the workspace and name it publish-data-to-fme-flow-resources.fmw.
Like uploading source data to a repository, select Upload data files and then open Select Files... Source files are uploaded to the repository by default, so open Select Location... to choose Resources instead.
Select the Upload to a shared resource folder option, then select the Data folder. Click New Folder to create an Elections folder to store the data.
Click OK to close and save your settings. From the Select Files to Upload window, you should now see that the upload location has changed to Data/Elections in the FME Flow Resources. Click OK to go to the last publishing step.
Register the workspace with the Job Submitter service and click Publish.
In the translation log's Publish Summary, you should see that FME included the three files as Uploaded Resources again.
Navigate to FME Flow and open the new Elections folder in Resources > Data. You will see the three uploaded files there.
Next, open the Run Workspace page and select your recently published workspace.
Under User Parameters, you will see the default source files reference the data you published to Resources.
Run the workspace. The workspace reads the data from Resources. Other workspaces can also use these datasets, limiting the duplicate data you otherwise store in repositories.
